

I am not as good as most of you with the detailed how to's but I figured I would give some insight to the 09 as I just finished it.
The lower air box case is the more involved out of the entire operation, once that is off, should only take about 15/20 minutes to finish and assemble it all back together.
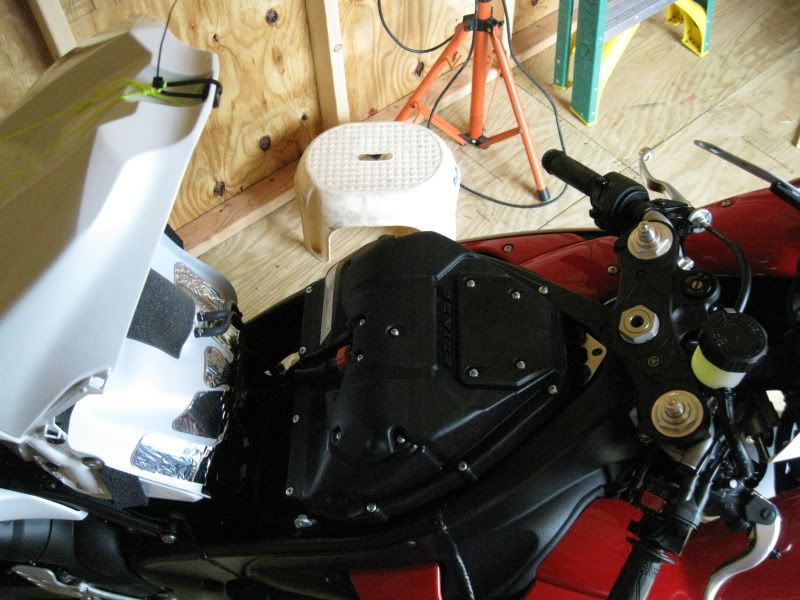
1) Take of the rider seat
2) Unscrew the side panel on gas tank, then slide it forward off
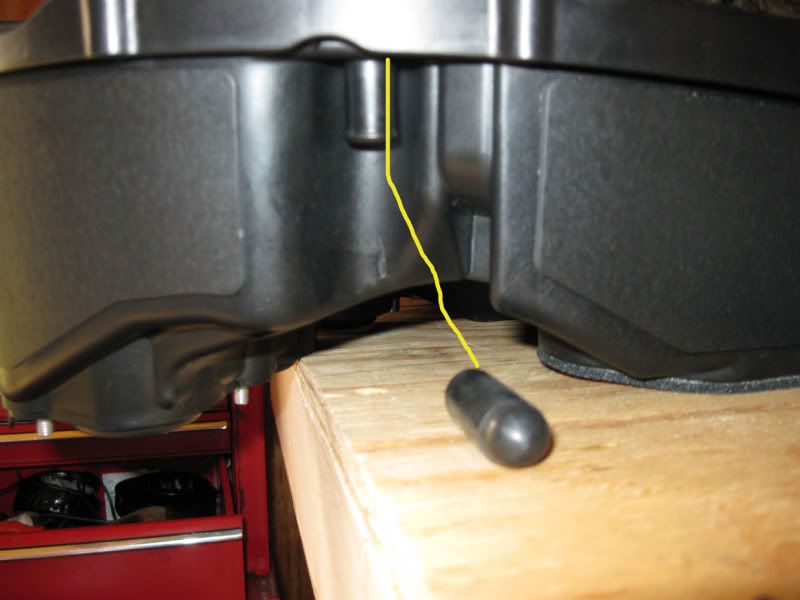
3) Remove the screws on side of tank and the one on top
4) Remove OR pull tank back and secure it up as I did.
![Image]()
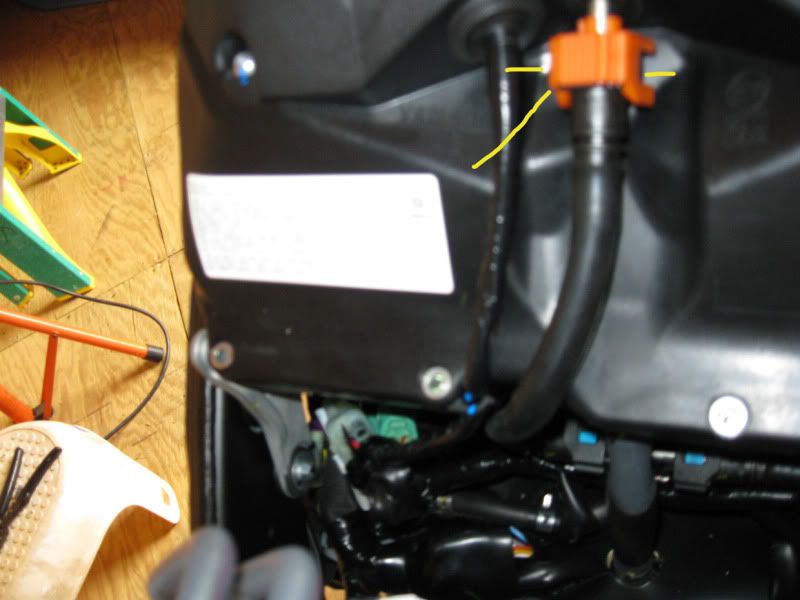
5) Disconnect wire at plug from air box
6) Disconnect fuel line on air box (pull up on orange clip and push 2 side buttons in and pull easy)....have a rag there for some fuel leakage/drippings
![Image]()
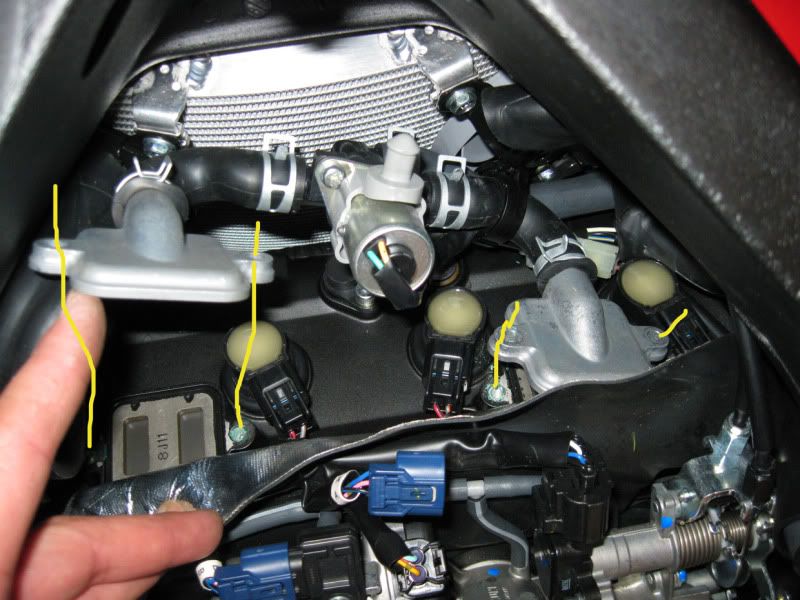
7) Remove all screws (phillips) from top of air box, take the top off
8) push off white clip as shown, these come off easy, just don't force anything.
![Image]()
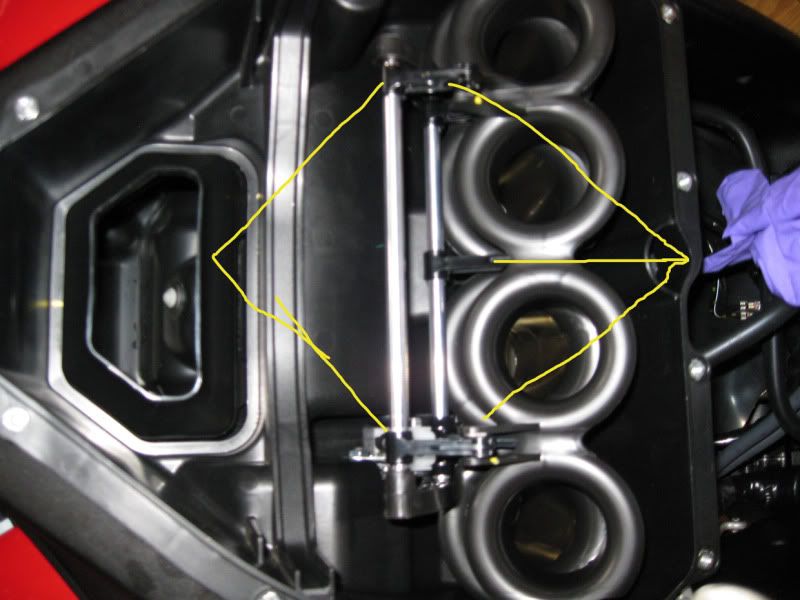
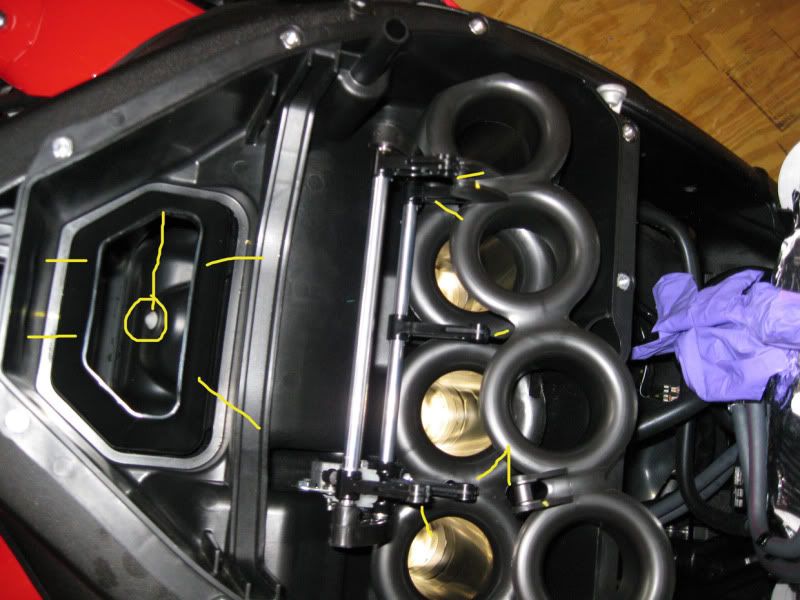
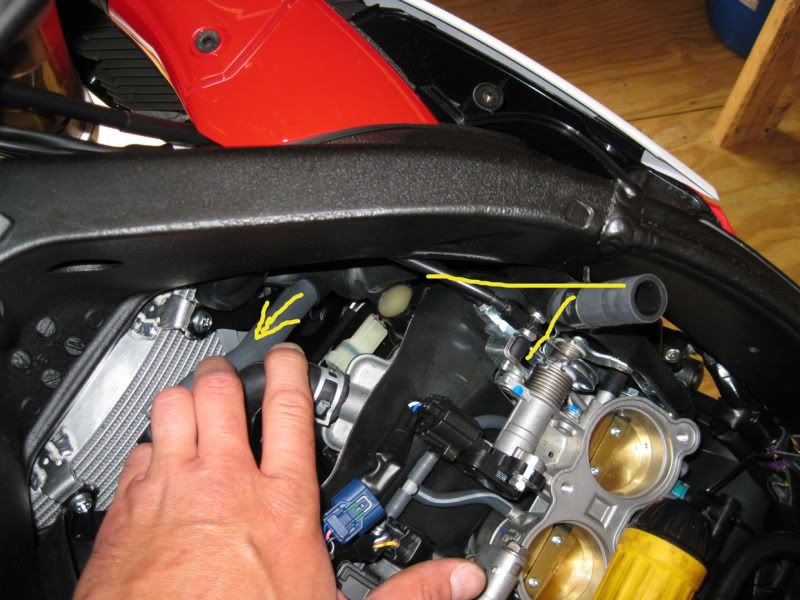
9) Push the 4 tabs and center snap button to separate the lower air filter case duct, unscrew (5mm) the 6 allen screws, do not remove, from the intake funnel joint. 2 of those are hard to see until you remove or pull up on the intake funnel servo motor rod assembly (on top of TB's) To remove, push out where it is snapped in place off of rods, easy to do just be easy and don't over force anything.
![Image]()
![Image]()
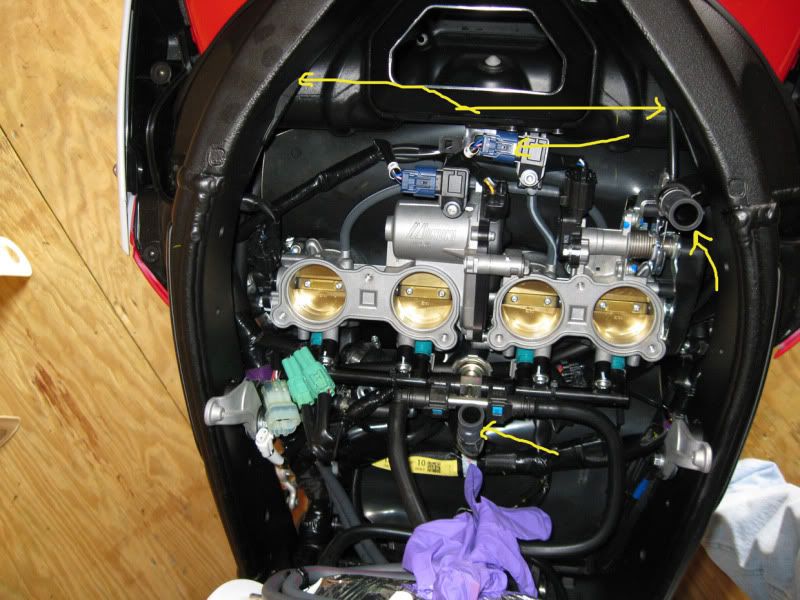
10) Remove Lower air box case, disconnecting the 2 hoses.
11) Unplug blue wire connector on air duct and wiggle the duct free one side at a time until it comes out, these connect to the ram air tubes.
![Image]()
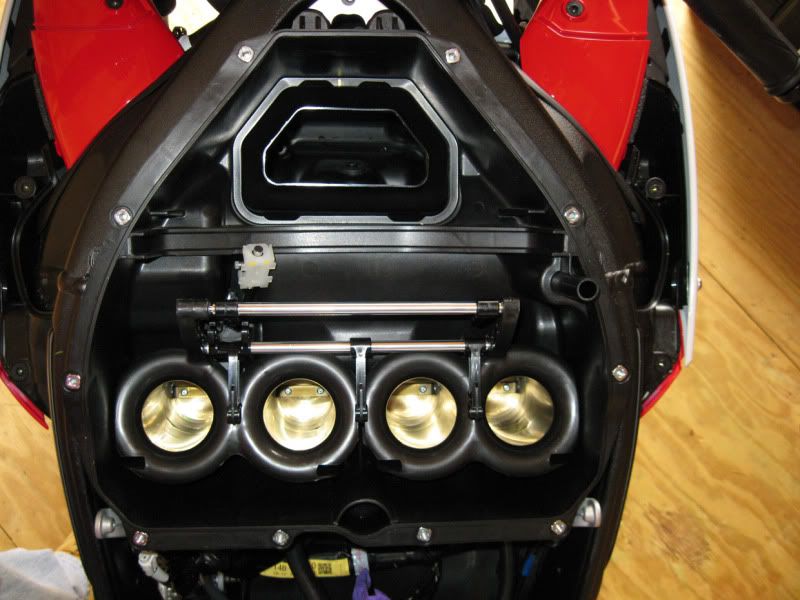
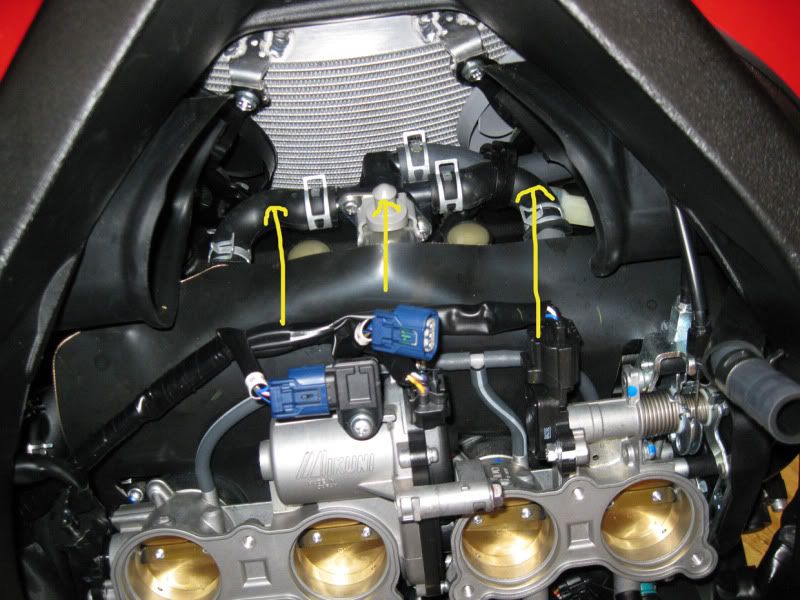
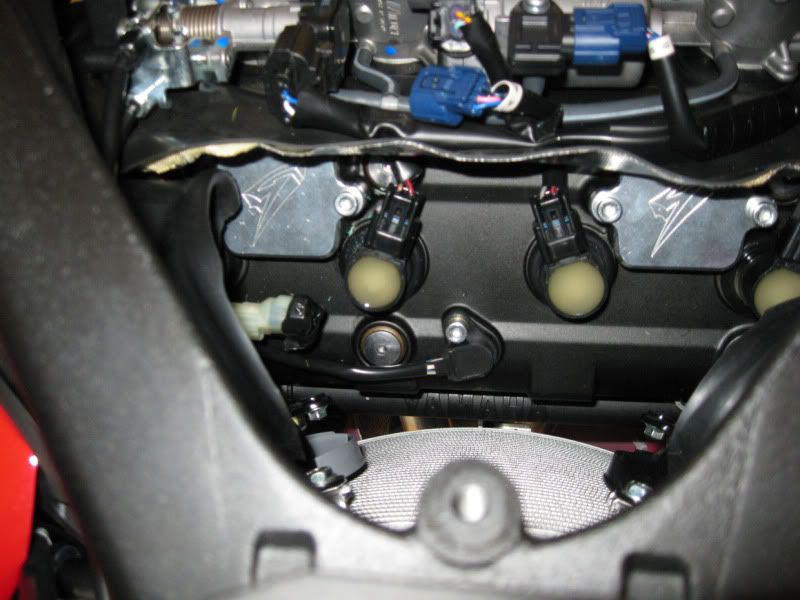
12) Once the duct is out you will immediately see the AIS
![Image]()
![Image]()
13) Remove the 4 (5mm allen) screws, unplug wire connector
![Image]()
14) Remove hose by pushing through side of bike til it's out
![Image]()
![Image]()
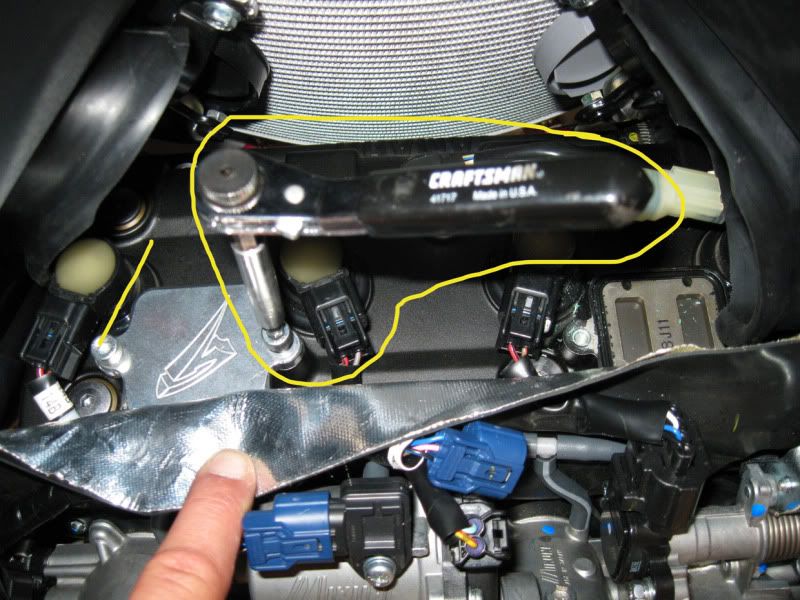
15) Take your plates and use blue locktite, I had to use red since its all I had on hand. and snug each side down, then tighten it down...I recommend using this type of wrench.
![Image]()
![Image]()
16) DO not forget to cap off the hole at the air box where the hose from the AIS went to
![Image]()
Putting it all back together is a breeze, go in reverse order, triple check all wire connections, fuel lines, clearance, all screws and bolts accounted for.....
I was a bit intimidated when I first opened the top part of the air box....Now that I did it, I will know exactly what to do next time it has to come off.
Hope this helps I hope it's detailed enough.
Billy
The lower air box case is the more involved out of the entire operation, once that is off, should only take about 15/20 minutes to finish and assemble it all back together.
1) Take of the rider seat
2) Unscrew the side panel on gas tank, then slide it forward off
3) Remove the screws on side of tank and the one on top
4) Remove OR pull tank back and secure it up as I did.
5) Disconnect wire at plug from air box
6) Disconnect fuel line on air box (pull up on orange clip and push 2 side buttons in and pull easy)....have a rag there for some fuel leakage/drippings
7) Remove all screws (phillips) from top of air box, take the top off
8) push off white clip as shown, these come off easy, just don't force anything.
9) Push the 4 tabs and center snap button to separate the lower air filter case duct, unscrew (5mm) the 6 allen screws, do not remove, from the intake funnel joint. 2 of those are hard to see until you remove or pull up on the intake funnel servo motor rod assembly (on top of TB's) To remove, push out where it is snapped in place off of rods, easy to do just be easy and don't over force anything.
10) Remove Lower air box case, disconnecting the 2 hoses.
11) Unplug blue wire connector on air duct and wiggle the duct free one side at a time until it comes out, these connect to the ram air tubes.
12) Once the duct is out you will immediately see the AIS
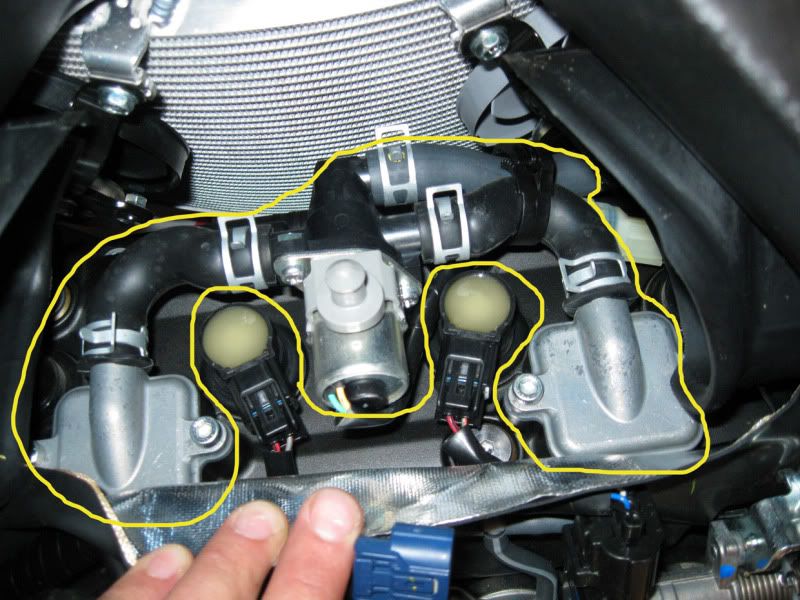
13) Remove the 4 (5mm allen) screws, unplug wire connector
14) Remove hose by pushing through side of bike til it's out

15) Take your plates and use blue locktite, I had to use red since its all I had on hand. and snug each side down, then tighten it down...I recommend using this type of wrench.
16) DO not forget to cap off the hole at the air box where the hose from the AIS went to
Putting it all back together is a breeze, go in reverse order, triple check all wire connections, fuel lines, clearance, all screws and bolts accounted for.....
I was a bit intimidated when I first opened the top part of the air box....Now that I did it, I will know exactly what to do next time it has to come off.
Hope this helps I hope it's detailed enough.
Billy


